View and Camera Configure
This dialog gives the way to configure the preview and camera path.

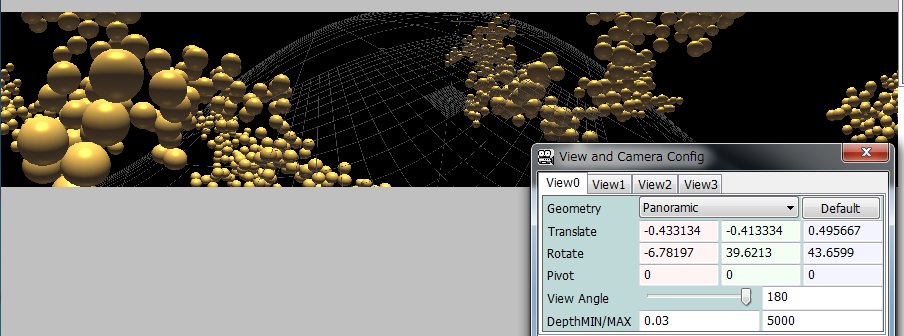
Selection of View0-View4 chooses the active preview panel 0-4. (Sorry, this is not working now. At now, top-left panel is always active.)
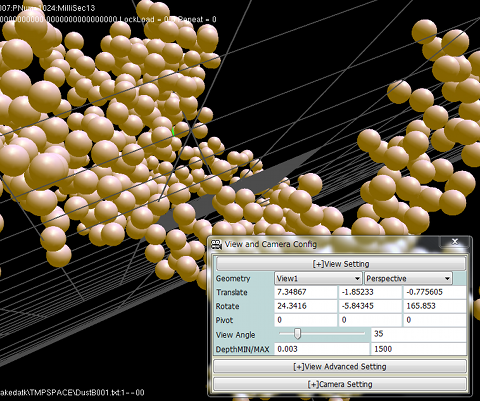
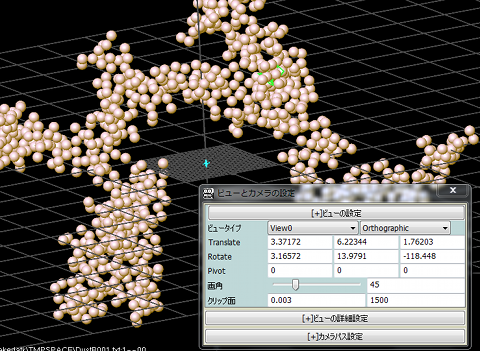
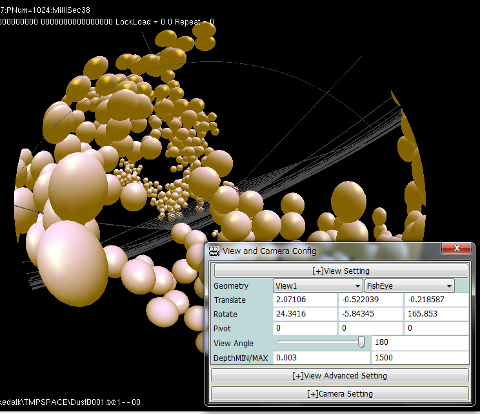
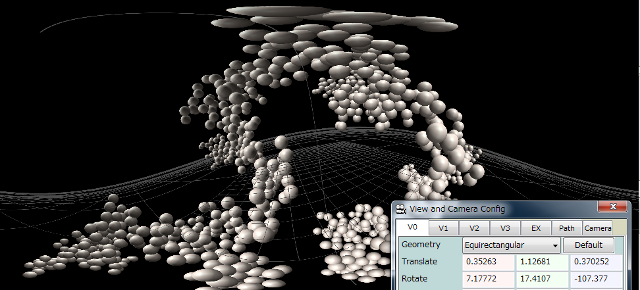
You can choose geometry of view from following types.
In Perspective view, view angle here is "vertical" angle of the view.
In Panoramic view, a horizontal region from -view angle to +view angle is shown.
(Full circle image around camera is obtained at value of 180).
Vertical angle is fixed to about 70 degree in panoramic view.
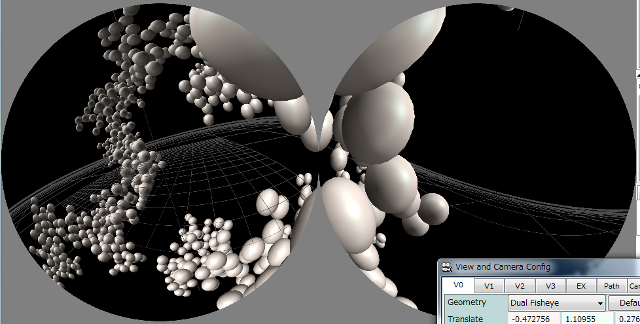
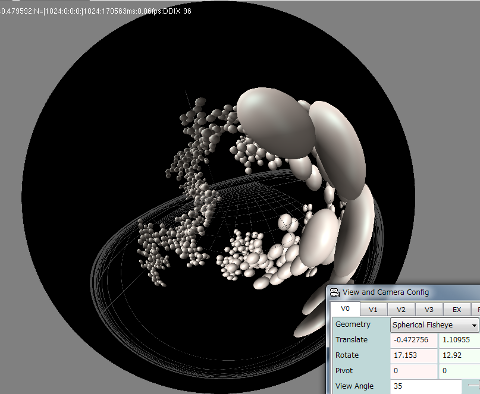
Equirectangular, Dual Fisheyes and, Spherical Fisheyes are for full 360 deg viewing. View angle setting would be ignored.
DepthMin/Max are clipping distances. Only objects with depth value (distance from the point of view) between DepthMIN and DepthMAX are shown on the screen.
 Note that these values determine the accuracy of hidden surface removal process.
DepthMIN value should be large and DepthMAX value should be small as long as the depth values of objects are within the range between them.
With ill-chosen settings (too small DepthMIN or too large DepthMAX), calculation about which polygon are hidden and which polygon are visible fails due to the lack of resolution, and images would be broken down like left image.


Fisheye or Panoramic rendering is composed of multiple flat rendering. If billboards are not pointed to camera precisely, a crease apprears at the border of each rendering. Set billboard quality parameter middle of better.

When checked on, the camera would be forced to look at the position of anchor.

Select back ground color. 2nd color is applied to the area outside the circle of view in the fish eye camera. 3rd color is color of tags
Select the type of grid. Type is not implemented yet.
Select font of tags. Currently tags is used in grid fileter only.

In default mode, Zindaiji3 uses FBO, i.e. it renders on texture memory and then displays the result on the screen. (This tricks make the output to be somewhat better).
Some virtual reality applications steal OpenGL information on other applications. But with FBO, the trick does not work.
In that case, you can go around FBO and directly draw objects on the screen. (Direct Draw mode).
In Direct Draw mode, several features such as exposures or fisheye rendering do not work.
Note that Intel HD Graphics does not implemet FBO correctly (especially 16bit FBO). Use 8bit FBO or Direct Draw.
Size of buffer. Larger buffer is better for image quality, but rendering time increases.
You can get 3 types pf preview image.
RGB is basic image.

RGBA shows alpha value (or optical depth). In preview mode, area with 0 alpha value would be drawn with checkerboard pattern.

Depth buffer shows how objects is far from the camera (or from clipping plane, exactly speaking).

Making two movies with RGB and depth beffer and processing them with some video editer like Adobe After Effects is fastest way for getting approximate focal blur effect.

Ensemble
With ensemble, preview image is multiple-rendered and averaged. Works with Focal blur, Area light, transparent shadow and dissolve (stochastic transparency) texture setting.
If Focal Blur is set and ensemble is cheked, images from slightly offsetted camera position would be averaged.
With sample number large enough, focal blur is mimicked even in preview image.
 In general, RGB value of each pixel is averaged in ensemble process. Exactly speaking, RGB value is not the true brightness on monitor, it is modified by gamma correction.
Thus, simple averaging of RGB values tends to lead darker image. When this checkbox is on, this effect is cancelled by additional correction.
Note that showing object with dissolve effect is mimicking showing semitransparent object with very low resolution.
If dissolve effect is processed in higher resolution enough, or averaged on large number ensemble, semi-transparency is achieved.
In general, RGB value of each pixel is averaged in ensemble process. Exactly speaking, RGB value is not the true brightness on monitor, it is modified by gamma correction.
Thus, simple averaging of RGB values tends to lead darker image. When this checkbox is on, this effect is cancelled by additional correction.
Note that showing object with dissolve effect is mimicking showing semitransparent object with very low resolution.
If dissolve effect is processed in higher resolution enough, or averaged on large number ensemble, semi-transparency is achieved.

 Dissolve is smoothed with ensemble averaging.
This method looks quite tricky. However, it has its own merit that z-sorting is not necessary.

Not only z-sorting between objects, z-sorting of polygons in one object can be skipped. Thus, this method is suitable for rendering complicated polygon objects.
There is a method of volume rendering that render volume as point clouds, a similar idea of above stochastic transparency.
With this check box, only 1/n number of particle is rendered for each enemble, where n is ensemble number.
To randomize the order of display, set Z-sort mode as "random".
Soft shadow from an area light can be rendered with ensemble averaging.

Cast shadow of semi-transparent object stochastically.
return
